Planting
Garlic is planted in the fall. Here in East Central Minnesota, we shoot for the middle of October, give or take a couple weeks, depending on the weather. The goal is to get it into the ground several weeks before a hard frost to allow for root development to begin, but late enough that top growth isn’t starting before freeze-up. In the fall of 2024 we moved our planting up a week to two weeks. Most of our garlic performed very well planted that early. Some of the new artichokes did emerge before freeze up and suffered more or less because of it. Moving forward we plan on starting to plant the very end of September beginning of October. We will start with the hard necks and end up with the soft necks more toward the middle of October. We are also continuing to experiment with spring planting some soft neck and creole varieties. So far we are seeing positive results from Idaho Silver, Thermadrone, and Denostia Red.
Separate the garlic cloves, but there is no need to unwrap the cloves. There are a number of different soaks that can be utilized to reduce diseases and pests or give the clove a fertilizer boost. We typically use an alcohol soak to sterilize the cloves. Cover the separated cloves with 70% rubbing alcohol for 10 minutes. Plant within an hour.
We till the soil ahead of planting and incorporate a good chicken manure fertilizer. In the past we have planted ours in double rows on 30″ centers. Now we are planting beds of four rows with 8″-10″ between rows. Most varieties get planted 6″ in the row, one or two smaller types get planted at 4″. Then we mulch the rows heavily with leaves. Good till spring!
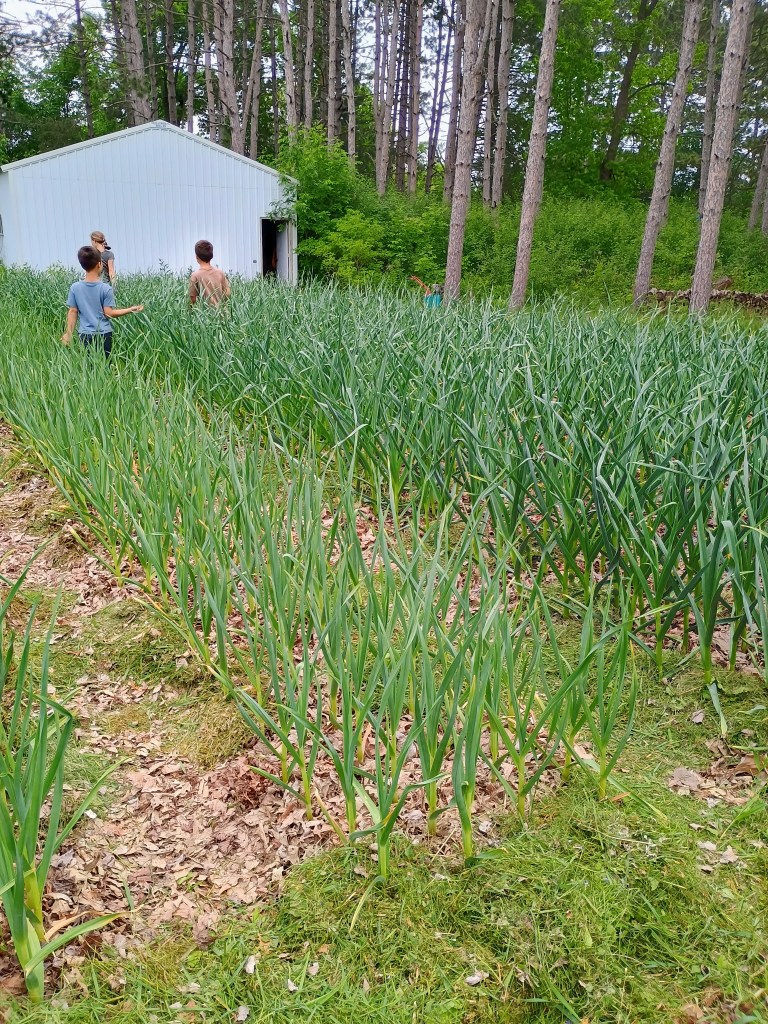
Spring
Once the weather has started to warm up, we used to pull the mulch off the rows, into the aisles to help the ground warm up faster. Now that we plant in four row beds we skip this step. We do frequently check the rows to see if there is regular emergence through the leaves. Wherever we see gaps we poke through the leaves to see if they are getting blocked. Once all the garlic has emerged we fertilize and mulch. We have used a couple methods for fertilizing over the years. We used to use a fish based liquid fertilizer which would be applied every other week until the scapes began appearing paired with mulching with fresh mowed grass cuttings. Yes, we did miss a week here or there. Our preferred liquid fertilizer had been discontinued a few years ago so we’ve been limping along trying to find another one. We have settled on using a dried, granulated chicken manure fertilizer. Now that we are growing the volume we have we no longer use the grass clippings. In 2023 I started making my own comfrey fertilizer. I fill a five gallon bucket with comfrey leaves. It works the very best if you strip out the larger stems. I fill with water to cover the leaves and cover it. It takes 6-8 weeks to rot/ferment depending on the weather. Warmer weather allows it to work faster. Once that’s all rotted down I strain it off and use the liquid as my fertilizer for everything. Even our potted plants love it. I started make it in large quantities. Once the ground is firm enough to walk into the garlic we start fertilizing every two weeks until the scapes start showing in June. We also fertilize the onions, popcorn, and other areas of the garden in a similar fashion, alternating weeks, at least until the summer solstice.
Scapes
When scapes begin to appear, sometime in June, this is the signal to stop fertilizing if using a liquid fertilizer. Once the scapes reach full curl, remove them at the top of the leaves. We go through every other day till there are no more. It usually takes us about two weeks or so from start to finish. Removing the scapes will allow the energy meant for seed making to be redirected back into the bulb, making it larger. This will be more noticeable in some varieties and less in others. Softnecks that bolt are more likely to bolt down near the bulb. Those cannot be broken off without damaging the entire plant. 2025 Update: We started pulling the scapes earlier this year, taking them as soon as they were long enough to get a good grip on. We also started pulling them out rather than snapping off. We were still able to get a lot of scape material because of pulling them and the plants sized up really well. It is hard to know how much to ascribe to pulling the scapes earlier or not. We also planted earlier and used the comfrey fertilizer. This was not a scientifically performed study. But there didn’t seem to be any negative effect from pulling rather than snapping.
Harvesting
Harvesting garlic for us usually begins in the week or two following the 4th of July. We usually start about the 4th digging one or two every few days to try and assess the readiness of the bulbs. You can judge by leaf tip burning which plants are ready first, but we have found that relying only on leaf tip die back we can sometimes wait a little too long to start harvesting. Waiting too long results in wrapper layers beginning to deteriorate, allowing more disease in and reducing storage life. UPDATE 2025: We have added Xian (turban) which is supposed to have a much earlier harvest period then the rest of the garlic for us. As of June 6th we haven’t harvested it yet but we are watching it closely. August 2025 Update: All our garlic was very late this year. As of August 4th we still have to dig our Chesnok Red, Spanish Roja, and Idaho Silver. This is partially due to business but also just that harvest started so late for us that we are still harvesting. Normally by this time all our garlic is out and dried and ready to go to the market.
If the ground is soft enough we can just pull the garlic right out of the ground. If not, we use a shovel or potato fork to loosen the ground and then pull the plant. We cut off the roots, bunch them in groups of 10 (for counting) and hang in a shed to dry for a couple weeks. Then we remove the stalks and clean of the dirt for storage and selling. 2025 Update: This year we have had some changes in our harvesting/cleaning process. These changes are partially due to the lateness of the harvest. We have had to combine the harvest and cleaning process. We also are attempting to prevent blotch from developing on our Music bulbs. This year, while we have still hung a few varieties right out of the ground, most of the varieties we are running through a cleaning process where we rinse, cut roots, peel one layer of wrapper then size. If we are going to hang it we don’t cut the stem yet. We bunch it and hang it under a fan. For the Music, we cut the stalk right away and laid out in crates under a fan right away. Due to the increasing size of our harvest, we intend to continue harvesting with this technique. The only downside is that as the garlic dries down, enough shrinkage occurs that we will sometimes have to resize the bulbs later on in the market season.
Storage
For our purposes we store them in crates with good air circulation. We still can get a very small amount of mold in the outer wrappers but it doesn’t harm the garlic. For long term storage, keep them in a dry place at room temperature and they should keep for the recommended shelf life according to each variety.